Section 11
This section describes the features available on the Data Manager screen. DataLINE provides an interface to store selected header information about the files downloaded from the refrigeration unit in a database (using the Interrogator utility, DataReader Download utility, DOS DataView, or other means). The capability to view files in the database and to import DCX files downloaded into the database using applications other than DataLINE are also provided.
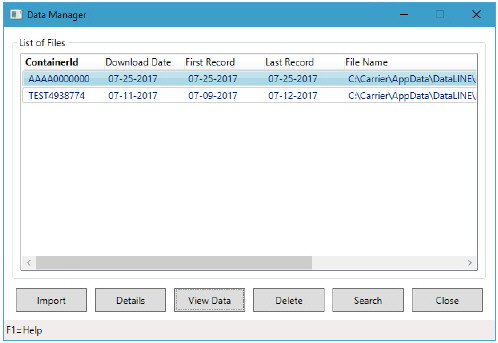
The Data Manager screen (Figure 11.1) is displayed when the user clicks on the Data Manager Button in the Tools Group Box on the Launch Pad.
Figure 11.1 Data Manager Screen
•F9 - Provides a shortcut for manually triggering the refresh operation.
11.2.1Features Available on the Data Manager Screen
•Import DCX files into the Data Manager database:
1.Click on the “Import” button.
2.Choose file name(s) in the “Select Files to Import” dialog box.
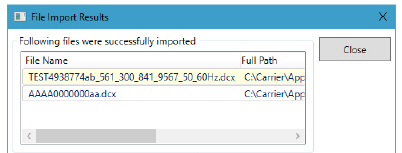
3.Click on the “OK” button. The information pertinent to the successfully imported file(s) appears in the “List of Files” Group Box for each DCX file on the Data Manager screen (Figure 11.1).
After the import process completes, the File Import Results screen (Figure 11.2) displays.
Figure 11.2 File Import Results Screen
•View detailed file information of a DCX file
•Search for files
•Sort the list of files in ascending, descending and custom order
•Delete the selected files from the database:
1.Select the files in the “List of Files” Group Box.
2.Click on the “Delete” button. The “File Delete Results” screen (Figure 11.3) is displayed upon completion of the delete process.
Figure 11.3 File Delete Results Screen

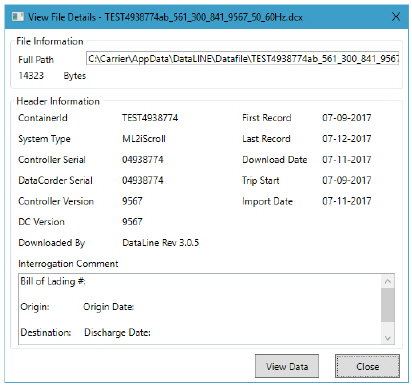
To view the detailed file information of a DCX file in the Data Manager database:
1.Select a row in the “List of Files” Group Box in the Data Manager screen.
2.The application provides two methods by which launch the “View File Details” screen:
a.Click on the “ViewData” button.
b.Right-click anywhere on the selected row in the “List of Files” Group Box. A pop up menu appears with three options, click on “View File Details”.
3.The information for fields available in the enhanced/standard header displays. The following “View File Details” screen (Figure 11.4) displays. To launch ViewData utility click on “ViewData” button.
Figure 11.4 View File Details Screen
11.4Specify Search Criteria Screen
The Data Manager utility provides the user with the capability to search for DCX files in the Data Manager database based upon the criteria specified by the user.
The Specify Search Criteria screen (Figure 11.5) is displayed when the user clicks on the “Search” button in the Data Manager screen.
Figure 11.5 Specify Search Criteria Screen
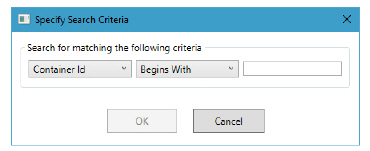
Specify the search criteria in the displayed fields and click on the “OK” button.
All the files that match the search criteria will be highlighted in the “List of Files” Group Box in the Data Manager screen.
11.5Specify Sorting Criteria Screen
The Data Manager utility provides the user with the capabilities to sort the list of files based upon any of the fields in the list. The user can customize the sort order up to three levels.
Customize the Sort Order:
1.Right-click on the column header of the list of files to be sorted. A pop up menu appears with three options.
2.Click on “Custom Sort…”. The “Specify Sorting Criteria” screen (Figure 11.6) is displayed.
Figure 11.6 Specify Sorting Criteria Screen
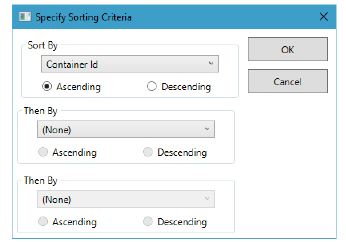
3.Select the sort criteria and click on the “OK” button.
4.All the files in the “List of Files” Group Box are sorted by the custom order of the selected column(s).